The mechanism controlling user permissions on a TeamSpeak 3 server is fundamentally different than in TeamSpeak 2. In TeamSpeak 2 individual users were added to the servers database and permissions bound to a user login name and password. In TeamSpeak 3 user login names and passwords no longer exist. Instead users connect to a virtual server providing just a nickname, which is only used for how to display the user to others but in no way related to access control. To identify a user on a TeamSpeak 3 virtual server, a public key encryption mechanism is used: When the Client is started for the first time, it automatically creates a key pair consisting of a public and a private key. The first time a new user connects to a virtual server, his client will automatically send his public key to the server. The virtual server creates an unique identifier from this public key and stores this identifier in its database. So instead of identification with login and password, a TeamSpeak 3 server identifies users by their unique ID. Should the user delete his private key and create a new one when connecting, he will be treated as a new individual by the server.
Since there is no input needed to "register" on a TeamSpeak 3 server there is no such thing as a manual registration in TeamSpeak 3. Basically once you connect you are automatically registered on the server you connected to. When you join again the server will recognize you.
Step 1
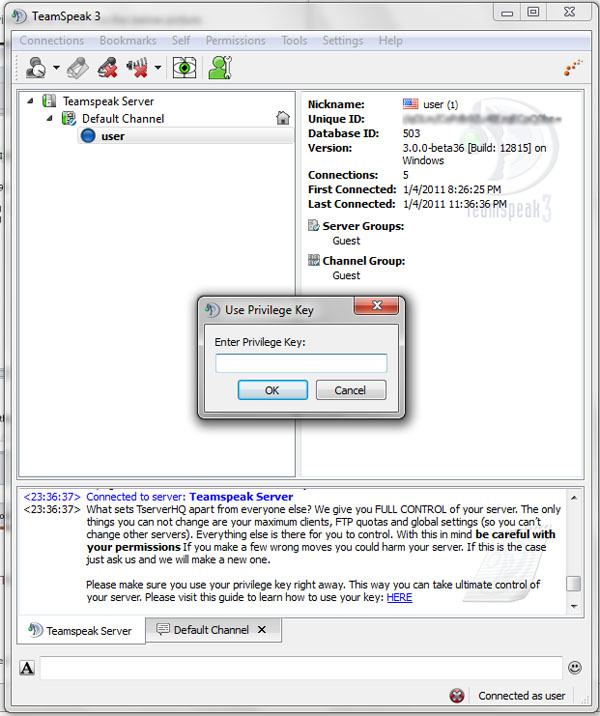
Log into your server with the information you were provided in your setup email (Learn how to connect to a teamspeak 3 server HERE). You will see that you are a regular user. Open the permissions tab at the top of the page. You will notice a button that says "Use Privilege Key"

Click on the "Use Privilege Key" button and you will be presented with a little window that looks like the below picture.
Step 2
Go into your email and locate the Privilege Key that was provided in your email. This will be the Privilege Key you put into the system. We suggest you copy and paste the Privilege Key from your email into the window.
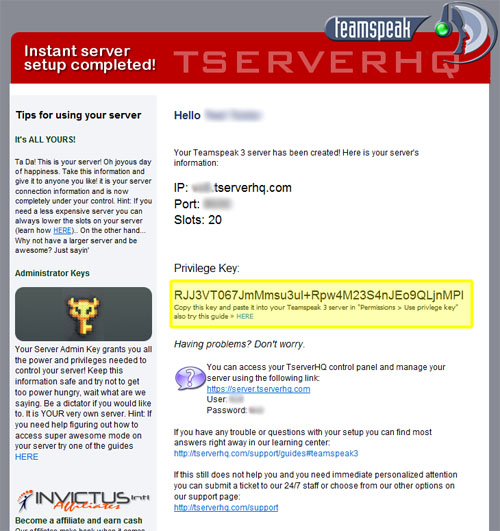
Highlight the entire Privilege Key and then copy it. You will then want to paste it into the window that was opened when you hit the "Use Privilege Key" button in that permissions tab.

