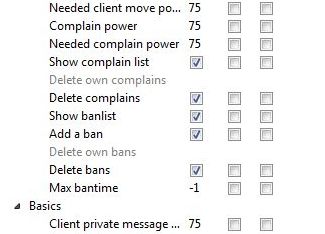
The Permission System is a very versatile and feature rich system that determines which users are allowed to do which actions. This system consists of groups that are assigned to sets of permissions. This can be uses for tiers of power or for even designation of class. In this guide we will go over where you can access your permission system and the basics of modifying them
Step 1 - Finding your permission manager
When you connect to a server for the first time you will notice that you don't have any rights or permissions unless the server owner has given the default user more rights. If this is the case you will need to get your own token from the server master or from your setup email.
If you can't select any of the permission managers then you don't have enough rights to make or modify permissions. You will need to get a hold of one of your server admins in order to get those rights.
Find the permission tab at the top of your Teamspeak 3 window. You will then notice 5 different options in modifying permissions. We will go over the first as the rest are fairly basic.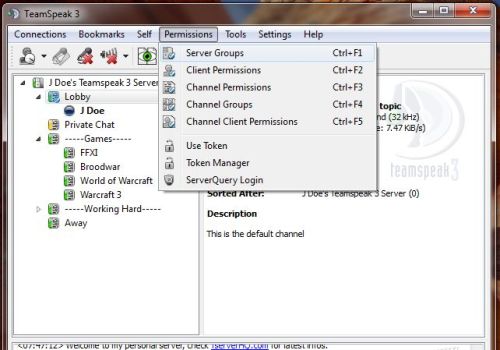
Step 2 - Knowing your permission manager
Click on "Server Groups" Once you click on this a window will appear. This window is divided into 3 sections:
Groups: This is a list of all the groups that you have for this particular section. Next to each name is a number this is their group ID. You will notice that you can modify these groups by the three buttons located at the bottom.
Permissions: This is the main navigation window. This is where you can go through and view all the permissions associated to the group and go about modifying those rights.
Clients: These are the clients that are associated with the highlighted group. The number next to each client is their group id number.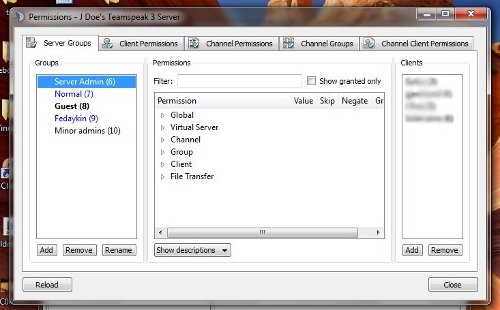
Step 3 - Adding and Removing permissions
So that we can narrow down our choices we will type in the desired permission that we want to assign to the group so we type in $quo;Kick$quo;� into the filter. When we click on the Guest group we see that they do not have any kicking privileges granted. If you right click on the permission you will see your options in adding the permission.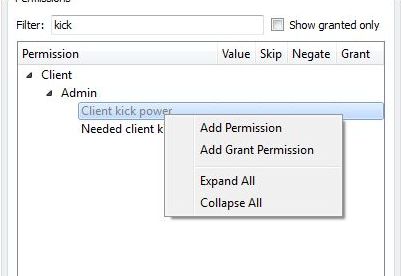
If you add the permission or the permission is already there when you right click on it again you will see that you then have options of removing that permission.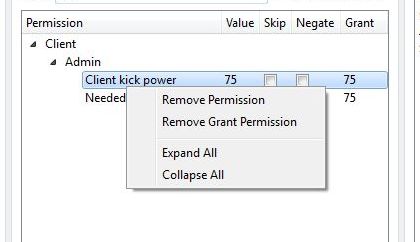
Step 4 - Understanding your permissions.
When permission is granted you will notice several options to the permission. It will look something like below
Let's go over briefly what each one means.
Value: This is the value of the permission. Depending on the type of permission this will determine the amount of power associated with the action.
Skip: This means that this power will not be overwritten by any other groups that the user might be in that have the same permission but different values.
Negate: This prevents the user from using the permission.
To read an in-depth explanation of how the permissions work please read our permissions and their functions guide HERE
You now have a basic understanding of how to create groups and modify their permissions. This opens so many possibilities it is hard to imagine what you can't do with all this flexibility.
Basic Example: We created a group that has all the powers of a server admin but still can't really change the server. We revoked the rights to modify permissions, create tokens and remove complaints made against them. Take a look at the screenshot below to see.