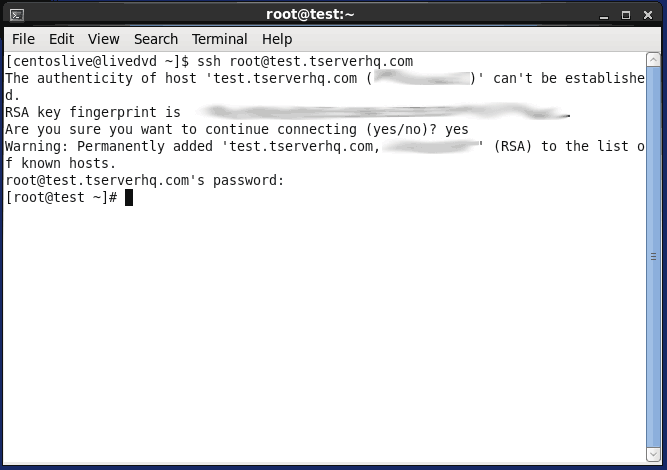
Connecting to your VPS is very easy and after a while becomes second nature. We will split this up into 3 sections depending on operating system
Windows
- 1. Download an SSH client.
- We highly suggest Putty it is the defacto standard amongst administrators. download Putty here We suggest just getting the regular PuTTY and the PuTTYgen if you plan to make SSH keys.
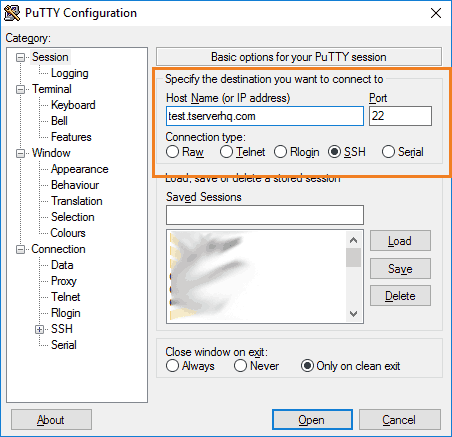
- 2. Open Putty and put in your IP or Hostname in the "Host Name (or IP address)" box. Just like the image below; set the port (default is 22); then click the "open" button.
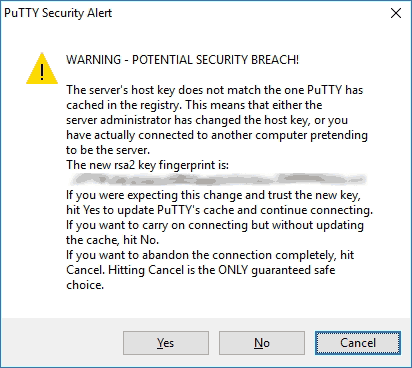
- 3. The first time you connect you will get a "The authenticity of host 'blah bla blah' can't be established." just accept it this time.
- If you see this in the future it means either the server has changed/reinstalled or someone is trying to hack you by posing their server as yours. Never just brush off this message it literally means you are connecting to a completely new and different server than you ever have before.
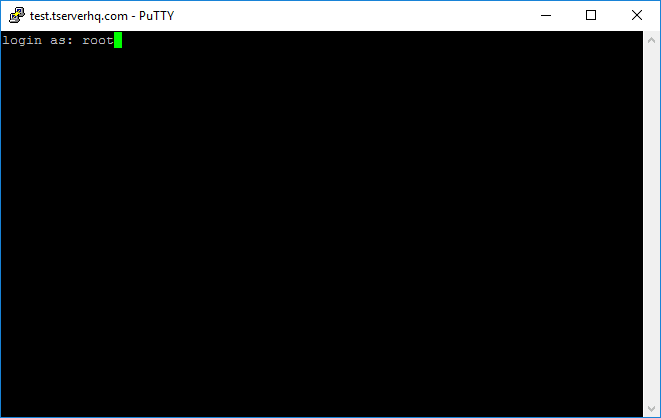
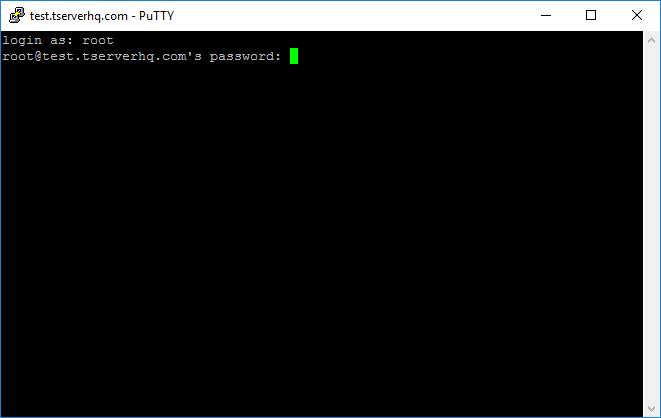
- 4. If you put in the correct information you should see a black box pop up with a "login as:" at the top. Type root for the password (please disable root login later on) and then pres the enter/return key on your keyboard.
- 5. You'll see a "user@ip's password:" show up. This is where you type or paste your root password.
- Nothing will show up as you are typing, this is normal and it is just in invisible trust us. If it is so complex that you have to paste it (look at you already being smart!) then copy it from where you have it saved and then right click in the black window and it will paste the password. This is how you copy and paste things into putty. After you've done this press enter again
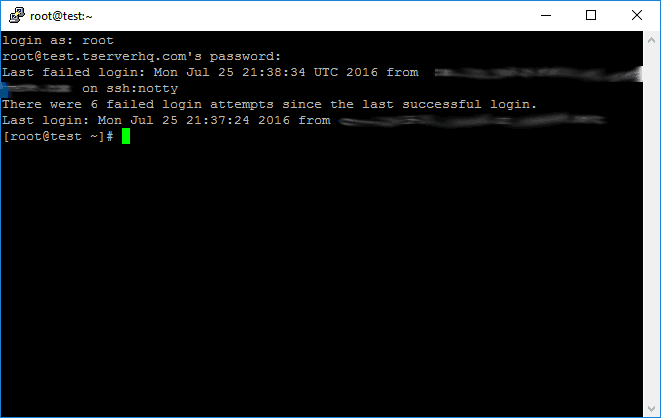
- 6. Once You're in You'll see the information of the last person that logged in, and how many failed login attempts if any. You are now in your server!
Mac OS
- 1. Open your terminal
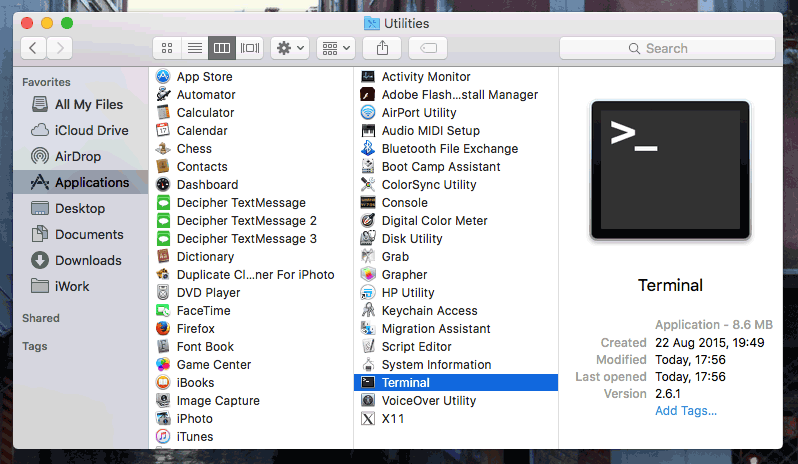
- Apple has a native SSH terminal that you can use. Navigate to Applications » Utilities and double-click on Terminal. A white box with a command line should pop up just like the screen shot below.
- 2. Type the SSH command to connect to your server. It will be
ssh user@ipCheck below for an example where we didn't specify the user and it defaulted to root. 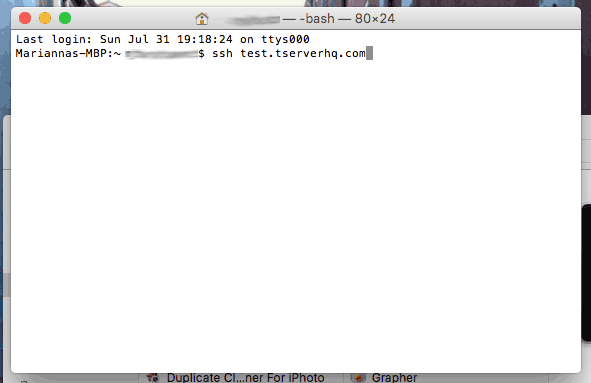
- 3. The first time you connect you will get a "The authenticity of host 'blah bla blah' can't be established." just type "yes" and press enter.
- If you see this in the future it means either the server has changed/reinstalled or someone is trying to hack you by posing their server as yours. Never just brush off this message it literally means you are connecting to a completely new and different server than you ever have before.
- 4. You'll see a "user@ip's password:" show up. This is where you type or paste your root password.
- Nothing will show up as you are typing, this is normal and it is just in invisible trust us. If it is so complex that you have to paste it (look at you already being smart!) then copy it from where you have it saved and then go back to terminal and in the menu go to Edit » Paste Selection and it will paste the password. This is how you copy and paste things into terminal. After you've done this press enter again
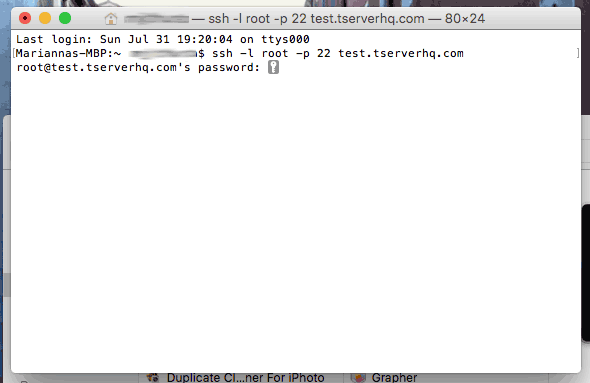
- 5. Once You're in You'll see the information of the last person that logged in, and how many failed login attempts if any. You are now in your server!
Linux Desktop
- 1. Open the SSH terminal.
- There are so many awesome versions of Linux desktop that are available we can't really go over all of them. Chances are though that if you're using Linux you already know where the terminal window is by heart. For this guide we are showing screenshots of our Centos live GNOME desktop that we had loaded onto a USB but it's all the same.
- 2. Type the SSH command to connect to your server. It will be
ssh user@ipCheck below for an example. 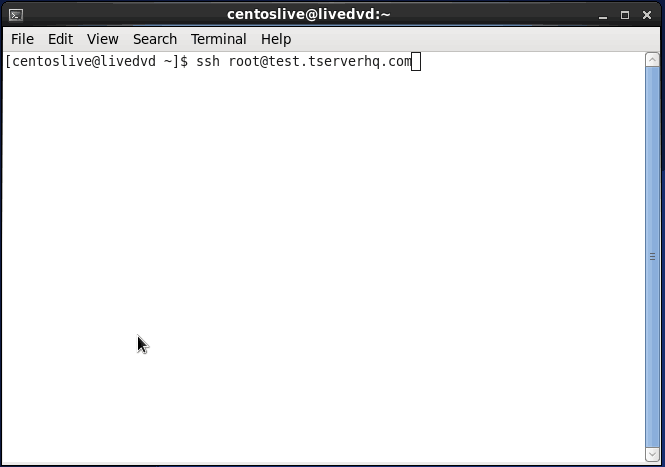
- 3. The first time you connect you will get a "The authenticity of host 'blah bla blah' can't be established." just type "yes" and press enter.
- If you see this in the future it means either the server has changed/reinstalled or someone is trying to hack you by posing their server as yours. Never just brush off this message it literally means you are connecting to a completely new and different server than you ever have before.
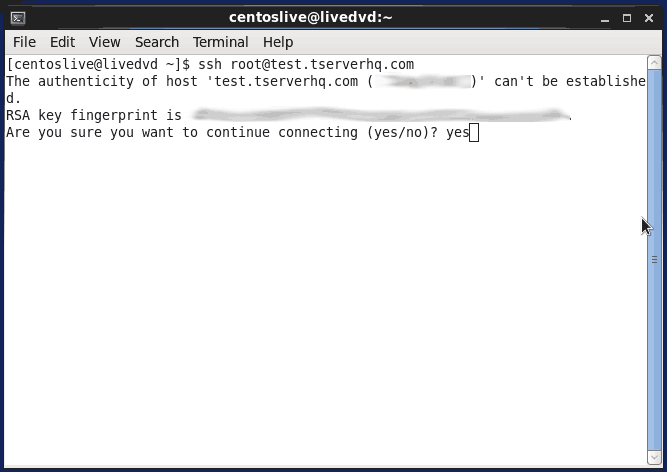
- 4. You'll see a "user@ip's password:" show up. This is where you type or paste your root password.
- Nothing will show up as you are typing, this is normal and it is just in invisible trust us. If it is so complex that you have to paste it (look at you already being smart!) then copy it from where you have it saved and then go back to terminal and in the menu go to Edit » Paste and it will paste the password. This is how you copy and paste things into terminal. After you've done this press enter again
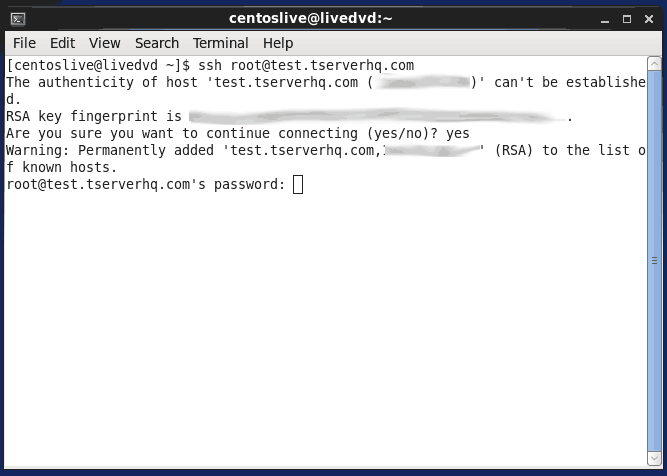
- 5. Once You're in You'll see the information of the last person that logged in, and how many failed login attempts if any. If you're the first person to login ever you won't see any message like below. You are now in your server!
